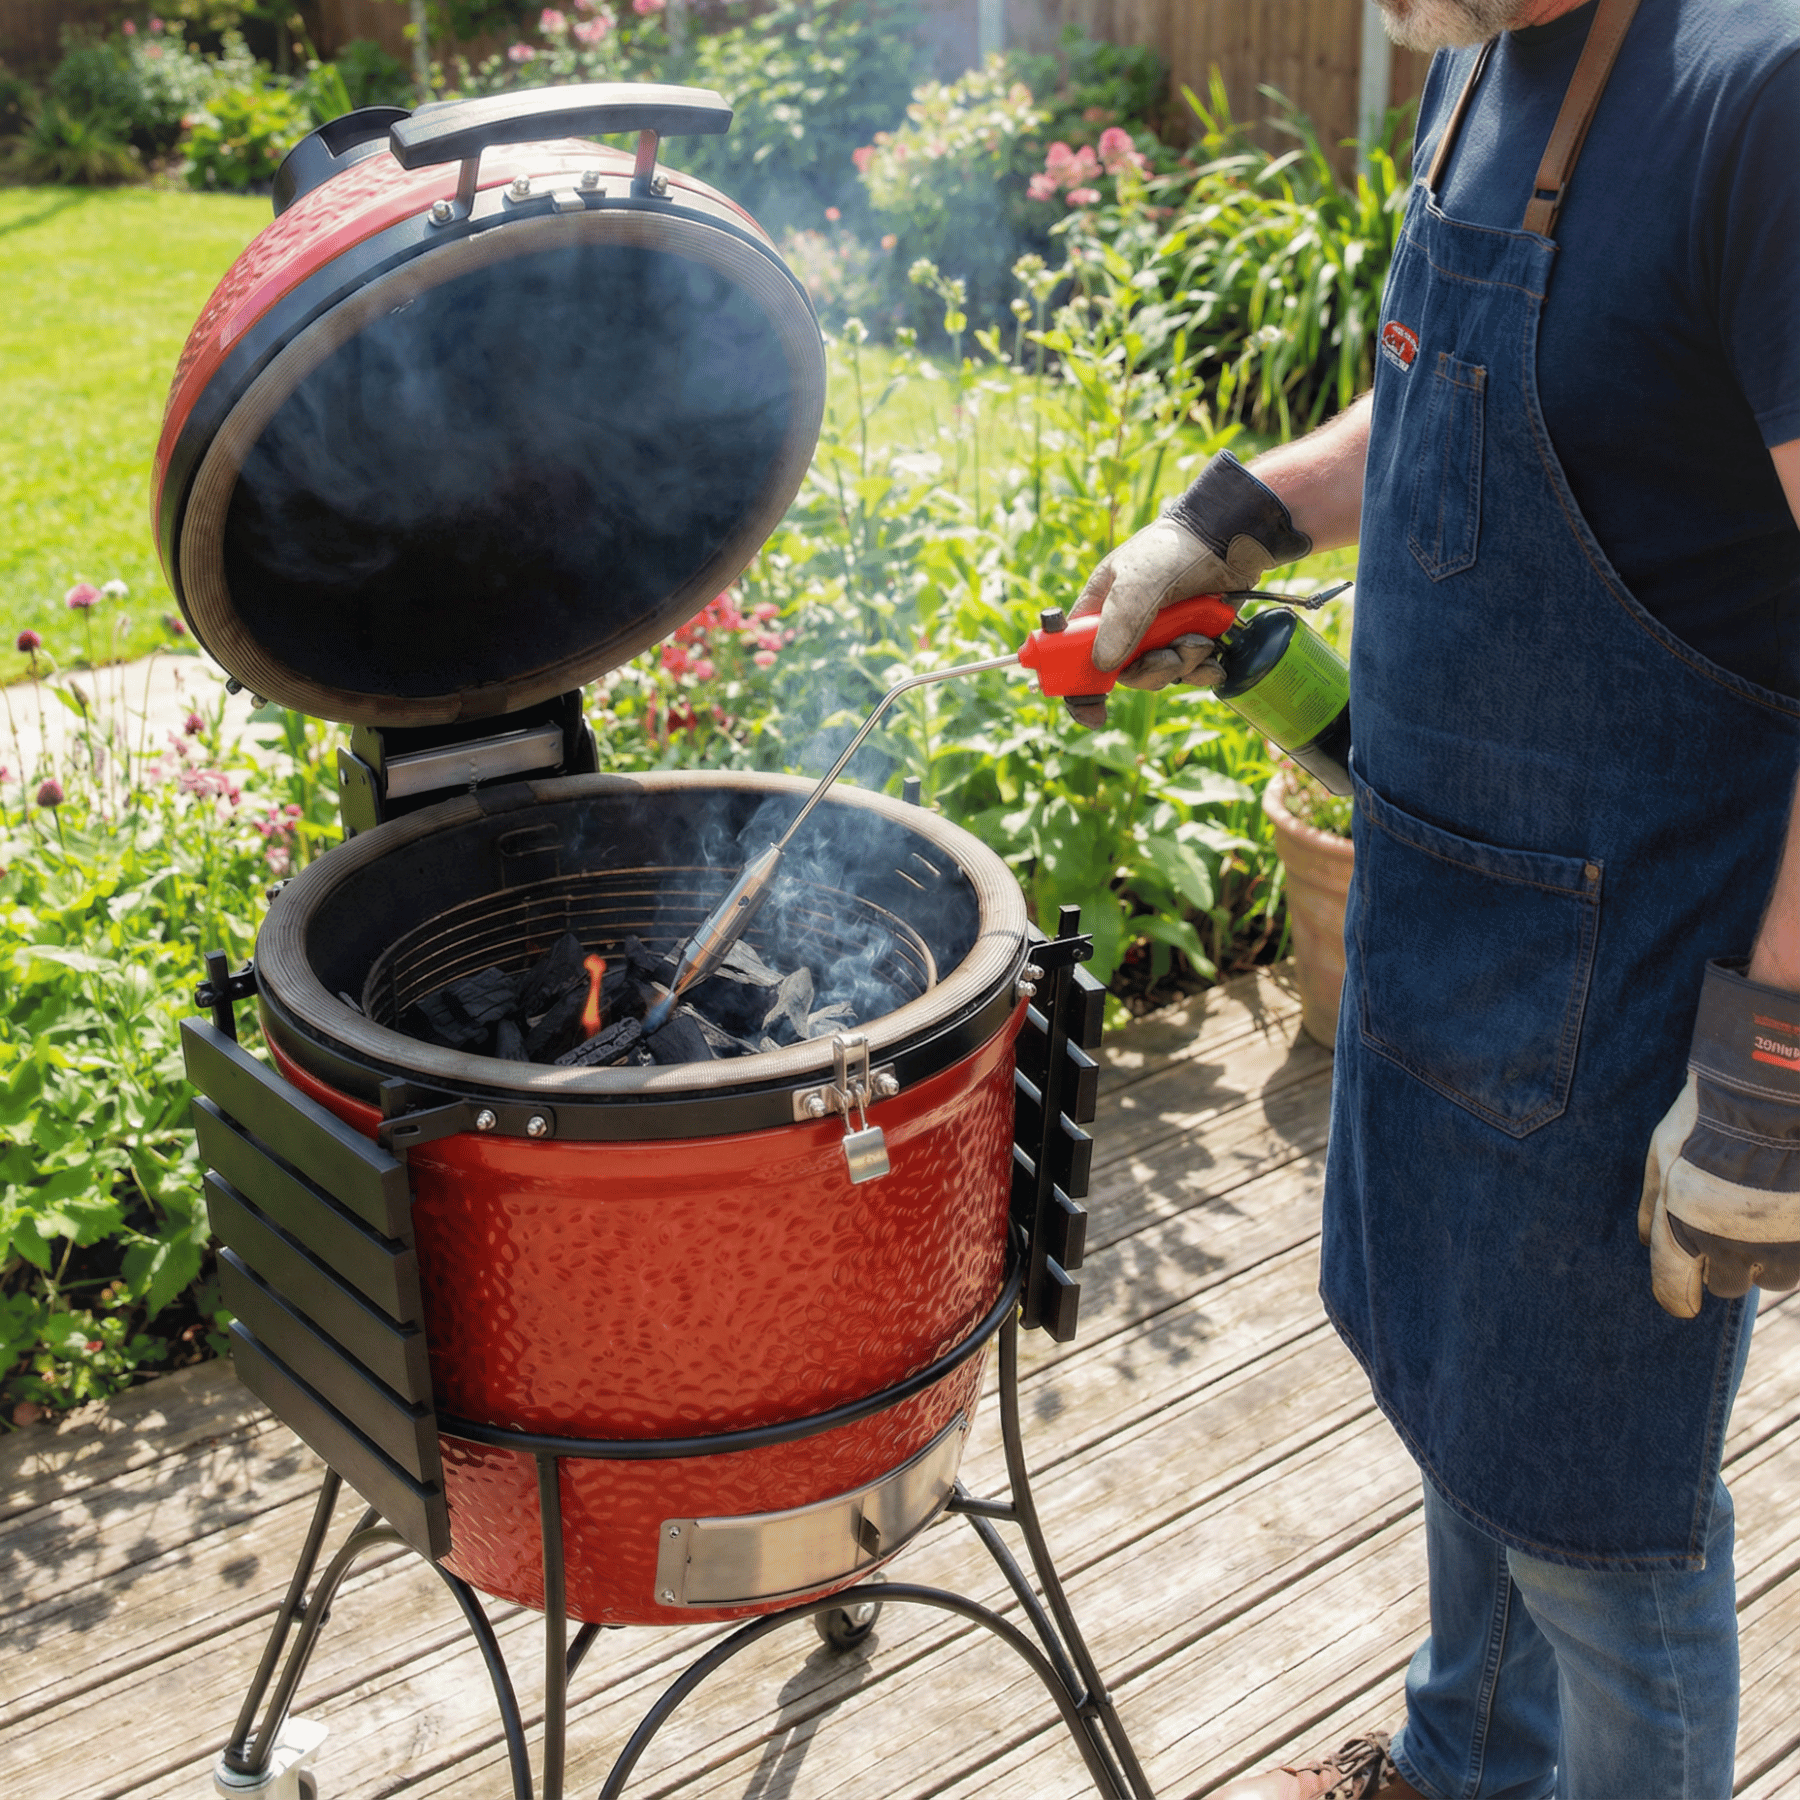
Read these instructions carefully before use. Familiarize yourself with the appliance before connecting it to a gas container.
The instructions outlined below should be read carefully before using the appliance, and then keep it for further reference. All the instructions provided are needed to use the appliance properly. Keep the instructions easily available for reference to avoid risks. Manufacturer accepts no responsibility for any damage as a result of improper use of the RocketFireā¢ torch or any modiļ¬cations made to the RocketFireā¢ torch or the attached fuel container.
1. GAS
This appliance is used with a pressurized gas container (Propane or MAP/Pro fuel suggested) fitted with a screw valve. This appliance shall only be used with screw or threaded type Map/Pro or Propane canister that comply with the CGA 600 canister standard. It may be hazardous to attempt to use other types of gas containers. Proper gas flow is essential for maintaining consistent flame and optimal performance.
Note: the RocketFire will not light or perform well if the propane you're using is colder than 60Ā°F. Insufficient heat can prevent proper ignition.
2. CHANGING THE GAS CONTAINER
2.1 FITTING THE GAS CONTAINER
Turn the Flow Control Regulator Knob (4) clockwise to turn the appliance off. Hold the torch and gas cylinder upright. Turn the gas cylinder counter-clockwise into the torch valve body until its hand is tightly secured. Please see Fig.1 illustration for reference. Do not force it too tight. Check the connection to make sure it's tight and inspect for leaks. The fuel tank must be properly connected to prevent gas leaks.
2.2 REMOVING THE GAS CONTAINER
Make sure the gas supply is shut off by turning the Flow Control Regulator Knob clockwise (4) to off. Then, hold the gas container in a vertical position and unscrew it clockwise to detach it from the appliance (Fig. 2). Never attempt to replace or refill the container while the torch lighter is in use.
ā¢ Check that the fuel supply and appliance are extinguished before disconnecting the gas container.
ā¢ Check the seals before connecting a new gas container to the appliance.
ā¢ Replace the gas container outdoors and away from people, pets, structures, and vegetation.
GAS SAFETY MEASURES
Check the Valve Seal O-Ring (9) inside Gas Valve (1) before connecting a new gas container to the appliance. Gas containers should be fitted or removed in well-ventilated areas, preferably in the open air, away from flammable substances or materials and incandescent sources of heat (such as flames, lighted cigarettes, hotplates, barbeques, grills, etc.), and AWAY FROM OTHER PEOPLE AND ANIMALS.
Sufficient oxygen is necessary for proper combustion.
3. OPERATING INSTRUCTIONS
3.1 LIGHTING
Turn the Flow Control Regulator Knob (4) in a counter-clockwise rotation. Push the Ignitor Trigger Button (6), and the flame will light. Most lighters require compressed air to function properly; ensure the air inlet is not blocked.
CAUTION
The appliance must be pointed downward (max 45Ā°) all the time andĀ AWAY FROM OTHER PEOPLE AND ANIMALS.
The phenomenon of flaring may occur during the warm-up period or if the appliance is shaken or used upside down. Don't forget that you don't need any lighter fluid, kindlings, or matches. Using a lighter upside down can cause irregular flame patterns and potential hazards.
3.2 USING THE CONTINOUS FLAME FEATURE
To engage continuous flame, press and hold the Ignition Trigger Button (6) and push the Continuous Flame Lock Button (5), as seen in Fig.3. Push the Ignition Trigger Button (6) again to deactivate the continuous flame feature. This design allows for an open flame that remains steady without requiring constant pressure.
CAUTION
Use extreme caution when locking in the continuous flame function, as the flame will burn continuously and will not turn off until the Continuous Flame Lock Button (5) is MANUALLY disengaged or when the gas container is empty.
3.3 ADJUSTMENT
Flame intensity may be adjusted by turning the Flow Control Regulator Knob (4) clockwise or counter-clockwise. Proper adjustment of pressure will help achieve optimal performance.
3.4 TURNING OFF
Turn the Flow Control Regulator Knob (4) clockwise until the flame is completely distinguished. Don't leave it unattended. Follow proper troubleshooting steps if the flame doesn't extinguish immediately.
CAUTION
IMPORTANT!Ā The burning flame will stay lit for a short time after turning the appliance off until the remaining gas in the handle unit is vented or burned.
4. STORAGE
Separate the torch from the gas container when not in use (Fig.2). Keep the appliance and gas cylinder in a cool, dry, and well-ventilated storage place. Confirm the Valve Seal O-Ring (9) is fixed to the torch. The seal is not replaceable. If missing, do not use it. Consider when to replace your torch lighter if significant wear is observed.
CAUTION
Keep the gas container away from direct sunlight. Never expose the container to a temperature over 120Ā°F (50Ā°C).
5. TROUBLE SHOOTING
Do not carry out any maintenance or repair work. Bring the appliance to a specialized repair shop for attention if a problem arises. Tampering with the device can result in serious injury. If you experience a weak flame, check for proper gas flow and pressure.
5.1 GAS LEAKS
If there is a leak in your appliance (smell of gas), take it outside immediately into a well-ventilated, flame-free location where the leak may be detected and stopped. If you wish to check for leaks on your appliance, do it outside. Do not try to detect leaks using a flame. Instead, use soapy water.
5.2 CHECK VALVE SEAL O-RING INSIDE GAS VALVE
Check the Valve Seal O-Ring (9) before use. Do not use the appliance if the O-ring looks worn, loose, or cracked. Do not use an appliance that is leaking, damaged, or does not operate properly. Carefully readthe gas container warning labeling before attaching it to the appliance. Unscrew the gas container from the appliance (Fig 2) as soon as you suspect a gas leak or damaged Valve Seal O-ring.
5.3 LOW-OXYGEN ENVIRONMENT
The Rocketfireā¢ will not perform properly in a low-oxygen environment, such as in a deep grill or barbeque that is not vented. For best performance, open all air vents on the grill or fire-pit before lighting. Proper oxygen flow is essential for complete combustion and efficiency.
WARNING
Keep young children away from the appliance and store the appliance out of childrenās reach.
This appliance must be used OUTDOORS ONLY, away from flammable substances and materials. Do not try lighting a charcoal grill in the garage either, even if its raining or snowing.
Always point the appliance downwards to avoid the flame flaring. If flaring occurs, move the gas container to the upright position for a few seconds. If you have to put out your grill our firepit quickly, throw backing soda on the flames.
Help! My Torch Won't Light
If your propane torch isn't lighting, it may be because your propane is cold and can't ignite. Remember that storing your propane in a cold area can significantly decrease the torch's performance. Liquid fuel requires adequate pressure to vaporize properly.
For this reason, we recommend keeping your torch lighter stored in a warm environment. Maintaining appropriate heat in your fuel system ensures reliable operation when you need it most.