

If you've just purchased a brand new grill or are preparing for the grilling season with a fresh one, knowing how to season a BBQ grill is essential. Properly seasoning your charcoal grill ensures a better cooking experience, preventing rust, enhancing the flavor of your food, and creating a nonstick surface.
Whether you’re using cast iron grill grates or another type of cooking grate, seasoning your grill properly can make all the difference. Read on to discover the steps for seasoning your brand-new grill to achieve the best grilling results.
Why Seasoning a BBQ Grill is Important
Seasoning a grill is the process of applying oil to the cooking surface and heating it to a high temperature. This creates a protective layer that helps prevent rust, allows for better cooking, and ensures your food doesn’t stick.
For a brand-new grill, this is especially important because it ensures that your grates, whether cast iron or another material, are properly conditioned and ready for cooking. A well-seasoned grill also improves the overall flavor of your food, giving you that perfect grilled taste.
Proper seasoning provides a solid foundation for your grill, enhancing the cooking experience. For the serious griller, maintaining the seasoning over time will keep your grill grates performing at their best.
Tools You’ll Need to Season Your Charcoal Grill
Before you get started, make sure you have these essential tools on hand:
- Grill Brush – For cleaning the cooking surface and removing any debris.
- Cooking Oil – Use a high-temperature oil like canola oil, vegetable oil, or peanut oil for best results.
- Spray Bottle – For applying oil to the grill grates evenly.
- Paper Towels – For wiping off any excess oil after applying.
- Soft Cloth – To wipe the grill once it’s cooled down.
- High Heat Source – Your charcoal will serve as the heat source.
Step-by-Step Process for Seasoning Your Charcoal Grill
Clean Your Grill Grates
The first step in learning how to season a BBQ grill is cleaning the cooking surface. Even if your grill is brand new, it’s important to remove any dust, factory residue, or oils that may be present. Use a grill brush to scrub the grates and remove any debris. If your grates are cast iron, be sure to clean them gently to avoid damaging the surface.
Once you've scrubbed away any dirt, rinse the grates to remove any soap residue. After rinsing, dry them thoroughly with a soft cloth or paper towel.
Apply Oil to the Grill Grates
Once the grates are clean, it’s time to apply oil. For cast iron or cast iron grill grates, you’ll want to use a high-temperature oil like canola oil, vegetable oil, or peanut oil. These oils have a high smoke point, meaning they won’t burn or break down at the high temperatures you'll be using.
Lightly coat the grates using a spray bottle or a paper towel. Be sure to apply a thin, even layer of oil over the entire cooking surface. Too much oil can cause flare-ups, so be sure to wipe off any excess with a paper towel.
Heat the Grill
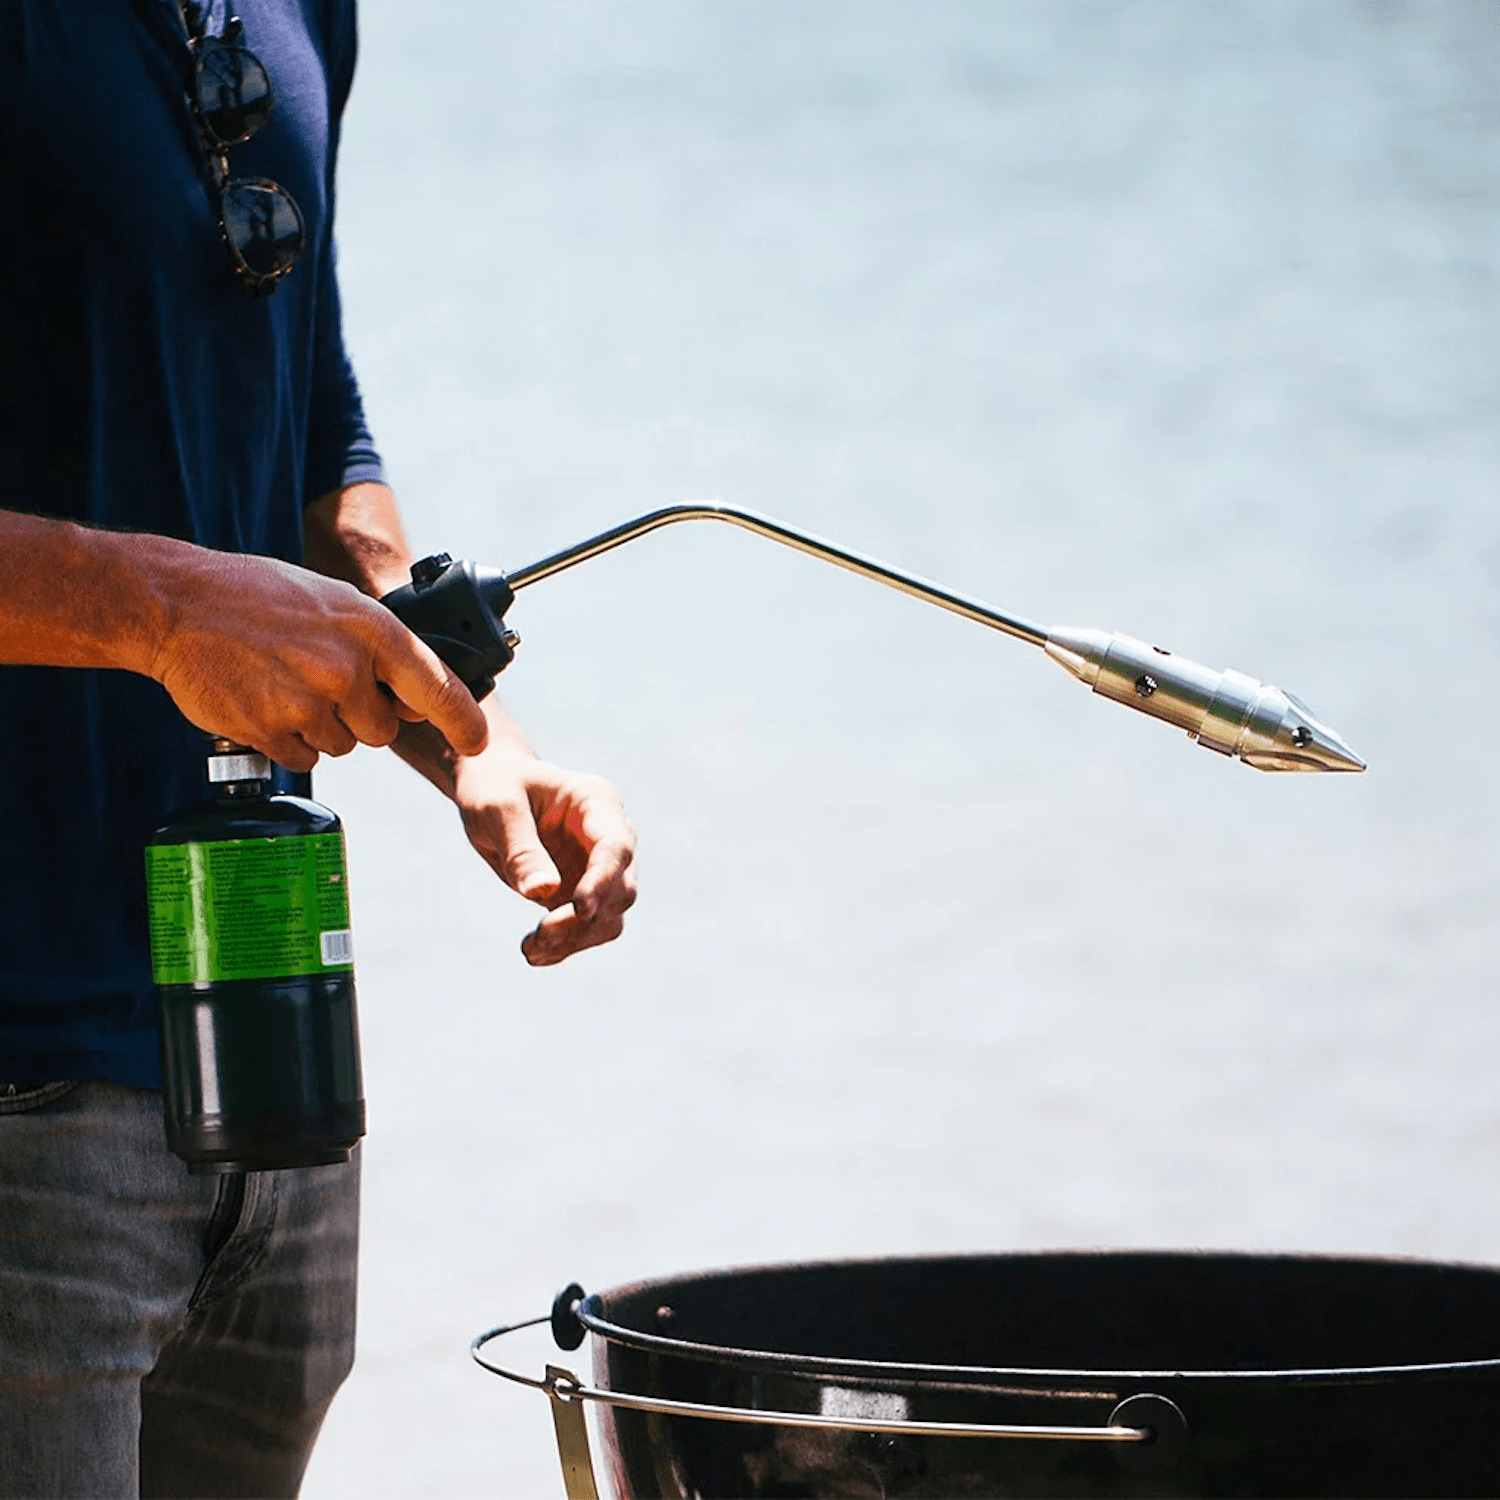
Once the oil is applied, it’s time to heat your grill. Set up your charcoal and light it using an innovative tool like the RocketFire™ Fire Torch. This tool makes lighting your charcoal quick and easy, allowing you to reach high temperatures faster and more efficiently.
For your brand-new grill, bring the heat to medium-high and close the lid to trap the heat inside. You want the temperature to reach high enough to bond the oil to the grates and create a protective layer. Allow the grill to reach high temperatures, then maintain that heat for about an hour.
The goal is to heat the grates to the point where the oil begins to bond with the surface, creating a durable, nonstick finish. With the RocketFire™ Fire Torch, you can achieve the perfect temperature for proper seasoning, ensuring your cast iron grates are properly heated so the oil can fully season the surface.
Let the Grill Cool
After about an hour, turn off the heat and allow the grill to cool completely. This cooling process is important for ensuring that the oil hardens into a durable layer. If you’re using cast iron grates, this step is essential for creating the protective layer that will help prevent sticking and rust.
Wipe Off Excess Oil
Once the grill has cooled down, check for any excess oil on the grates. Use a paper towel or a soft cloth to wipe off any remaining oil. The goal is to leave a thin layer of oil that is bonded to the grates. This coating helps prevent food from sticking and ensures a smooth cooking surface for future grilling.
Reapply Oil and Repeat
For a more durable seasoning, you may want to repeat the process two or three times. Simply apply another thin layer of oil to the grates, heat the grill again, let it cool, and wipe off any excess. Cast iron grates especially benefit from multiple layers of seasoning, which strengthens the nonstick surface and helps with rust prevention.
Tips for Maintaining the Seasoned Surface
Now that your brand-new grill is seasoned, it’s important to maintain the seasoned surface to ensure the longevity of your grill. Here are a few tips:
- Re-season your grill every few months, especially after heavy use, to maintain that nonstick surface.
- After each grilling session, clean the grates with a grill brush to remove any food debris and prevent buildup.
- If you notice any rust forming on your cast iron grates, give them a good cleaning and re-season them.
- Always apply a thin layer of oil after each use to maintain the nonstick surface and prevent rust.
Now that you’ve learned how to season a BBQ grill, your brand-new grill is ready for action. Whether you’re using cast iron grates or other types of grilling grates, proper seasoning is key to achieving a smooth, nonstick cooking surface and preventing rust.
With the right seasoning process, your grill will provide a better grilling experience, ensuring that your food cooks perfectly every time.
With the right tools, patience, and care, you’ll be able to maintain your grill and enjoy many grilling seasons to come. So, fire up that charcoal, and get ready to enjoy your first meal off your perfectly seasoned brand-new grill. Happy grilling!